Adult Diaper Testing Methods
Introduction
One of the most common questions asked by our customers is “which product is best?” When buying incontinence products, it is often impossible to tell which products perform well, and which will not. Choosing the wrong product can mean wasted money, extra laundry, and embarrassment for the user.
To address the situation, we have developed simple but thorough testing methodologies that can objectively differential products.

Step 1: Dry Measurements
- The diaper to be tested is stretched flat on a solid surface.
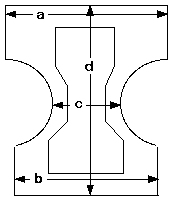
- Measurements are taken at 4 locations on the padding and 4 on the backing material:
- Across the front wings
- Across the back wings
- Across the crotch
- Lengthwise from front to back
Step 2: Capacity testing

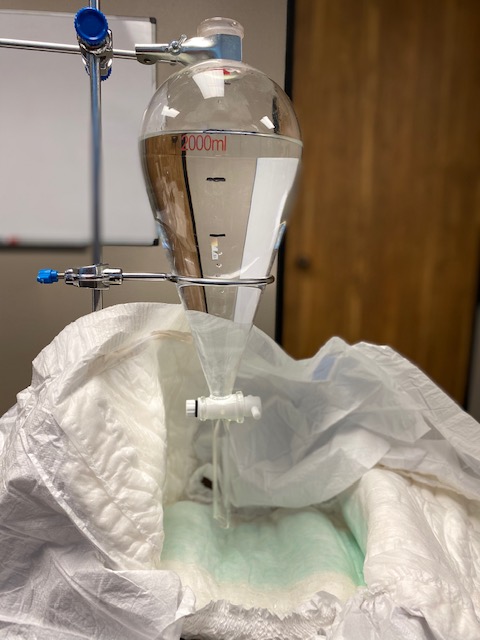
- The diaper is arranged in a U-shape to simulate it being on a person. It is placed at the bottom tip of a separator funnel that provides a consistent flow of room temperature water to the same spot on the diaper. The water is able to flow freely on the padding.
- 16 ounces of water are released through the separator funnel. The diaper is observed for any leaks over the sides.
- After waiting 5 minutes, the diaper is re-wet with another 16 ounces. This step is repeated two additional times, so that the diaper has 64 ounces in it.
- The diaper is pressure tested under a 8x12” plate with 50 lbs. of pressure added to determine if any fluid leaks out.
- If it passes the pressure test, a 5th wetting of 16 ounces is started and continues until a leak is observed. No additional wettings are test after the 5th one.
- The “Wicking Distance” and “Thickness at Capacity” are then measured.
Go to the test results.


